The Most Inspected Areas During End of Tenancy Checks: A Detailed Overview
As your tenancy comes to an end, it’s essential to prepare for the inevitable end of tenancy check. Landlords and letting agents will look at various areas in the property to determine whether any cleaning or repairs are needed before they hand back your security deposit. Here are the most inspected areas during these checks and some effective cleaning tips to help you pass with flying colors.
Kitchen
The kitchen is often the most scrutinized room. It’s where grease and grime can accumulate quickly. Focus on the following:
- Oven and Hob: Remove any racks, soak them in hot, soapy water, and scrub with a non-abrasive sponge. Use an oven cleaner for the inside to tackle tough stains.
- Fridge and Freezer: Empty and defrost, then wipe down all surfaces with a mixture of vinegar and baking soda for a fresh smell.
- Cabinets and Drawers: Clear out all items, then wipe down the inside and outside. Pay special attention to corners where food particles can hide.
Living Room
The living room is a space where dust can accumulate. When prepping for inspection, remember:
- Corners and Skirting Boards: Dust can settle in less visible areas. Use a microfiber cloth to dust these spots.
- Carpet and Upholstery: Vacuum thoroughly, and consider a deep clean or steam treatment, especially for stains.
- Windows and Curtains: Wash windows inside and out. If your curtains are washable, follow care instructions for cleaning. If not, vacuum them gently to remove dust.
Bathrooms
Bathrooms are high on the list of areas inspected for cleanliness and hygiene. Key points to consider include:
- Shower and Bathtub: Use a bathroom cleaner to scrub the surfaces and remove soap scum. Don’t forget grout cleaning, as discolored grout can be a red flag.
- Toilet: Ensure the toilet bowl is scrubbed clean. Pay attention to the areas behind the toilet which often get neglected.
- Sinks and Mirrors: Clear out any debris, and use glass cleaner for mirrors to avoid streaks.
Bedrooms
Your bedroom should reflect a neat and organized space. Here’s how to prepare:
- Beds and Linens: Ensure your bed is made, and all linens are washed and neatly folded or placed away.
- Wardrobes and Drawers: Empty out these areas and do a deep clean. Don’t forget to wipe down surfaces.
- Flooring: Vacuum carpets or clean hard flooring properly. Pay attention to behind the bed and other furniture.
Additional Tips
Besides the mentioned areas, remember these general cleaning tips:
- Dust Regularly: Dust surfaces weekly to prevent the buildup that could be a major deterrent during checks.
- Check Smoke Detectors: Ensure all smoke detectors are functional. A check here can be a hidden inspection point.
- Examine Light Fixtures: Clean all light fixtures and replace any burnt-out bulbs. This adds to the overall look of the property.
To facilitate a smooth end of tenancy check, consider hiring professional cleaning services to help you. Many services specialize in end-of-tenancy cleaning that meets landlord expectations. You can find reliable companies through resources like Checkatrade, which provides vetted professionals.
By focusing on these critical areas and applying these cleaning techniques, you’ll increase your chances of a successful inspection, which can ultimately help ensure you get your full deposit back. Don’t forget to set aside enough time before your inspection to make the cleaning process less stressful.
For more tips and resources check out The Property Inspections for guidance tailored to your needs.
Essential Cleaning Tips for Kitchen Appliances in Rental Properties
Kitchen appliances often require special attention when cleaning, especially in rental properties. Keeping these appliances spotless is essential not only for maintaining hygiene but also for ensuring you receive your full security deposit back. Below are practical cleaning tips tailored to the most common kitchen appliances in rental homes.
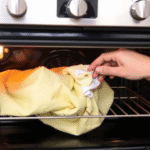
Ovens
Ovens can accumulate grease and food particles over time. Here’s how to clean them effectively:
- Use a baking soda paste: Mix baking soda with water to create a paste. Apply it to the oven’s interior and let it sit for at least 12 hours before wiping it clean.
- Vinegar Spray: After scrubbing the paste off, spray vinegar to help remove any residual grease.
- Clean the knobs and exterior: Wipe down knobs with a damp cloth and use vinegar for a deeper clean.
Refrigerators
A clean refrigerator is key to preventing odors. Here’s an effective cleaning routine:
- Empty the fridge: Take everything out before starting.
- Remove shelves and drawers: Wash these parts separately with warm, soapy water.
- Clean the interior: Use a solution of water and vinegar to wipe down all surfaces.
- Defrost if necessary: If you have a freezer, ensure you defrost it regularly to maintain efficiency.
Microwaves
Many people overlook the microwave, but it can harbor stubborn stains and odors. Follow these steps to clean it:
- Steam it: Place a bowl of water with lemon slices inside and run the microwave on high for 5 minutes. This will help loosen grime.
- Wipe it down: After steaming, simply wipe the interior with a clean cloth.
- Clean the exterior: Use a multipurpose cleaner for the outside, as this area often collects fingerprints and smudges.
Dishwashers
Even dishwashers need cleaning! Here’s how to keep them in tip-top shape:
- Run an empty cycle with vinegar: Place a cup of vinegar in a dishwasher-safe container on the top rack and run a hot cycle.
- Check and clean filters: Remove food debris from filters to ensure efficient operation.
- Wipe down the door seals: Use a damp cloth to clean any grime around the door seals which can harbor bacteria.
Small Appliances
Don’t forget about small kitchen appliances like toasters and blenders:
- Toasters: Unplug the toaster and shake out crumbs. Wipe the exterior with a damp cloth.
- Blenders: Fill the blender with warm water and a drop of dish soap. Run it for a few seconds and rinse.
Cleaning your kitchen appliances doesn’t have to be a daunting task. By using the right techniques, you can ensure they remain sparkling clean throughout your stay in your rental property. Consistent upkeep will not only make cooking more enjoyable but can also help you maintain a good relationship with your landlord. For further cleaning tips and advice, you might find useful resources at The American Cleaning Institute or Good Housekeeping.
Common Bathroom Issues and How to Tackle Them
When it comes to maintaining a home, the bathroom can often be a source of common issues. Understanding how to tackle these problems can save you time, money, and stress. Below are some frequent bathroom issues and practical solutions to address them effectively.
Leaky Faucets
A dripping faucet is not just annoying; it can also lead to increased water bills. The first step in fixing this issue is to identify the source of the leak. Common culprits include:
- Worn-out washers
- Corroded valve seats
- Loose O-rings
To resolve this, turn off the water supply, disassemble the faucet, replace any damaged parts, and then reassemble it. You can find replacement parts at Home Depot.
Clogged Drains
Clogged drains are frustrating and can cause water to back up in the sink or shower. Here’s how to tackle this:
- Use a plunger to try and dislodge the obstruction.
- If that does not work, mix baking soda and vinegar. Pour it down the drain, wait for 30 minutes, then flush with boiling water.
- If the clog persists, consider using a plumber’s snake to clear deeper blockages.
Regularly maintaining your drains can prevent clogs from developing. For ongoing issues, it might be worth consulting a plumbing professional.
Mold and Mildew
Bathrooms, due to their humid environment, can be breeding grounds for mold and mildew. Combatting this requires regular cleaning and more permanent solutions:
- Regular Cleaning: Use a mixture of water and vinegar to wipe down tiles and surfaces. This helps kill mold spores.
- Improve Ventilation: Ensure that your bathroom fan is functional. If it’s not adequate, consider upgrading to a more powerful unit.
- Seal Grout Lines: Sealant can help prevent moisture from seeping into grout, which is a common breeding ground for mold.
Toilet Issues
Toilets can have various problems, such as running water, clogs, or leaks:
- Running Toilet: Often caused by a faulty flapper valve, simply replace it to fix the issue.
- Clogged Toilet: Use a plunger, or for tough clogs, a toilet auger might be necessary.
- Leaks: Check the seals around the base. If you see moisture, it might be time to replace the wax ring or tightening the bolts.
Finding the Right Cleaning Solutions
Choosing the right products can make a big difference in your cleaning efforts. Look for:
- Non-toxic cleaners that are effective against mold and mildew.
- Scrub brushes and sponges specifically designed for bathroom surfaces.
- Glass cleaners that leave streak-free finishes.
For more product choices, check out Clorox, which offers a variety of cleaning items tailored to bathroom upkeep.
Cracked Tiles
Cracked or chipped tiles not only look unpleasant but can also lead to bigger issues such as water damage. If you notice cracks:
- Assess the extent of the damage—small cracks can often be repaired with epoxy or grout sealer.
- For larger issues, consider replacing the tile. Make sure to match the existing color and style.
Final Tips for Bathroom Maintenance
Regular checks and maintenance can prevent many of these issues from becoming more serious. Here’s a quick checklist to help:
- Check faucets and pipes for leaks monthly.
- Clean mold-prone areas weekly.
- Ensure proper ventilation to reduce humidity.
- Inspect toilets and plumbing fixtures regularly.
Tackling these common bathroom issues can greatly enhance your home’s comfort and functionality. By staying proactive, you can maintain a clean and inviting bathroom for you and your guests.
The Importance of Carpets and Floors in End of Tenancy Inspections
When moving out of a rental property, the importance of carpets and floors during end of tenancy inspections cannot be overstated. These elements not only contribute to the home’s aesthetic appeal but also play a significant role in the final valuation. Landlords and property managers often pay close attention to the condition of these surfaces, and tenants can face hefty deductions from their security deposits if they are not well maintained. Understanding what to look for and how to clean carpets and floors effectively can make all the difference in ensuring a smooth transition.
Common Issues with Carpets
Carpets tend to accumulate dirt, stains, and allergens over time, making them a focal point during an inspection. Here are some common issues that landlords look for:
- Stains: Spills from food and drink can leave unsightly marks.
- Odors: Unpleasant smells may linger if carpets are not cleaned regularly.
- Wear and Tear: Faded areas or fraying edges can indicate a lack of upkeep.
- Allergens: Dust and pet dander can build up, posing health risks.
To address these concerns, here are effective cleaning tips:
- For basic dirt, use a vacuum cleaner with a good filtration system.
- For stains, blot the area with a cloth and a mixture of water and vinegar.
- Consider hiring a professional cleaning service if the carpet hasn’t been deep cleaned in a long time.
- Use baking soda to neutralize odors; sprinkle it on the carpet, leave it for a few hours, and then vacuum.
Flooring Types and Their Care
The type of flooring in a rental property can vary greatly, and each type requires its own cleaning approach:
| Floor Type | Common Issues | Cleaning Method |
|---|---|---|
| Hardwood | Scratches, water damage | Use a damp mop with a pH-balanced cleaner, avoiding excess water. |
| Laminate | Scratches, dullness | Mop with a laminate-safe cleaner; avoid steam mops. |
| Ceramic Tile | Grout staining, dust | Use a mixture of vinegar and water; scrub grout lines with a brush. |
| Vinyl | Scratches, discoloration | Mop regularly with mild soap and water. |
Keeping these floors in top shape is crucial for a successful inspection. You can always refer to manufacturer guidelines for specific cleaning techniques.
Preparing for Inspection
Taking a proactive approach to cleaning is key when preparing for an end of tenancy inspection. Here are some steps to ensure your carpets and floors are inspection-ready:
- Assess the Damage: Inspect the carpets and floors for any noticeable issues beforehand.
- Deep Clean: Schedule a professional cleaning service if necessary.
- Fix Minor Issues: Repair small scratches or gaps in flooring with wood filler or laminate glue.
- Provide Access: Ensure that the inspector can easily access all areas, including behind furniture.
By following these steps, you can significantly improve the chances of a favorable inspection outcome.
For more resources on maintaining your rented home, consider visiting Help I Am Moving or Apartment Guide. They provide helpful insights on tenant responsibilities and cleaning tips.
Understanding the significance of carpets and floors during end of tenancy inspections equips you with the knowledge needed to tackle cleaning and maintenance effectively. Not only will you improve the appearance of the space, but you will also help protect your security deposit and foster a satisfactory relationship with your landlord.
Overlooking Walls and Ceilings: What to Know Before Moving Out
When it comes to moving out, many tenants focus primarily on deep-cleaning the floors and appliances, often overlooking an essential aspect of their space: the walls and ceilings. Understanding the importance of these surfaces can save you from disputes with landlords and ensure a smooth transition. Here are key considerations and tips for cleaning walls and ceilings before your end-of-tenancy inspection.
Why Pay Attention to Walls and Ceilings?
Landlords look for signs of damage, neglect, and dirt in almost every corner of their property. Walls and ceilings can carry marks, stains, or even signs of mold that could result in a deduction from your security deposit. Here are some common issues to be aware of:
- Dirt and Stains: Over time, fingerprints and scuff marks can accumulate.
- Water Damage: Look for discoloration or peeling paint.
- Mold or Mildew: Particularly in bathrooms and kitchens, damp areas can develop mold.
- Scuffs from Furniture: Moving furniture can leave behind unsightly marks.
The Best Ways to Clean Walls
Here’s a step-by-step cleaning guide to tackle your walls effectively:
- Gather Supplies: You will need a sponge, mild detergent, a bucket of warm water, and possibly a magic eraser for tough stains.
- Dust First: Use a microfiber cloth or duster to remove loose dust and cobwebs.
- Prepare Cleaning Solution: Mix warm water with a small amount of mild dish soap. Avoid harsh chemicals that could damage wall paint.
- Test a Small Area: Test the cleaning solution on an inconspicuous spot to ensure it won’t cause discoloration.
- Wipe Down Walls: Using your sponge, gently scrub the walls, working from the bottom up to prevent streaking.
- Rinse: After cleaning, rinse with a cloth dipped in clean water to remove soap residue.
- Dry: Use a dry towel to wipe off any excess water.
Ceiling Cleaning Tips
Cleaning ceilings can feel daunting but is essential to ensure they meet inspection standards:
- Use a Broom with a Soft Brush Attachment: This helps in reaching high corners without stretching.
- Damp Cloths for Suds: If dust and grime are present, use a damp cloth with mild detergent to clean the surfaces carefully.
- Focus on Cobwebs: Particularly in corners, ensure you remove any cobwebs present.
- Consider Ceiling Ridges or Texture: If your ceiling has texture, use a vacuum with a brush attachment to remove dust buildup.
Important Areas of Focus
In addition to stains and dirt, there are specific spots you should particularly focus on:
| Area | Cleaning Method | Tips |
|---|---|---|
| Light Fixtures | Wipe with a damp cloth | Turn off power for safety. |
| Baseboards | Scrub with a sponge and cleaning solution | Pay attention to corners where dirt collects. |
| Air Vents | Vacuum and wipe down | Helps improve air quality moving forward. |
By paying attention to walls and ceilings, you can significantly enhance the condition of the rental property. Cleaning these areas can prevent misunderstandings with your landlord and allow you to leave the property in good standing. If you want more detailed guides or additional tips, resources like Rent.com provide extensive checklists and advice for every aspect of moving out. Don’t underestimate the power of clean walls and ceilings—they could make all the difference in your moving-out experience.
If you are unsure about your cleaning efforts, consider hiring professionals who specialize in end-of-tenancy cleaning. Teams from services like End of Lease Cleaning Melbourne can provide expertise to ensure you don’t miss anything. With a few extra steps, you can increase your chances of getting your full deposit back and leave your rental space refreshed for the next tenant.
Preparing Outdoor Spaces: A Quick Guide for Renters
Creating an inviting outdoor space can enhance your living experience as a renter. Whether you have a balcony, small patio, or a shared garden, you can still transform these areas into a personal oasis. Here are some simple yet effective ways to prepare your outdoor spaces, making them comfortable and enjoyable.
Assessing Your Outdoor Space
Before diving into the transformation, take a moment to assess the condition of your outdoor area:
- Cleanliness: Is it cluttered with debris or old furniture?
- Privacy: Do you have other units nearby that might overlook your space?
- Safety: Check for any potential hazards like broken tiles, sharp objects, or loose railings.
Cleaning Your Outdoor Space
A clean space is the first step toward creating an inviting environment. Here are cleaning tips for various outdoor surfaces:
- Paving Stones or Concrete: Sweep away loose dirt and debris. Use a pressure washer or a mixture of warm water and vinegar to tackle stains.
- Furniture: Wipe down your outdoor furniture with soap and water. For wooden pieces, make sure to use a suitable wood cleaner.
- Plants: Trim overgrown shrubs and remove any weeds. Freshening up the soil can breathe new life into your plants.
Improving Comfort and Aesthetics
There are plenty of ways to make your outdoor area comfortable and visually appealing:
- Cushions and Throws: Add cushions to outdoor seating for comfort. Outdoor-safe pillows and throws will make your space much cozier.
- Lighting: String lights or lanterns can provide a warm ambiance during the evening. Solar-powered options are energy-efficient and easy to install.
- Planters: Use colorful planters to bring a pop of color. Consider herbs or flowering plants that can thrive in your region.
Enhancing Privacy
Privacy can be a concern, especially in shared rental spaces. Here are some creative solutions:
- Outdoor Curtains: Hang curtains to block the view from neighbors while still allowing light to filter through.
- Indoor/Outdoor Rugs: Place a rug to define your space. This can also add a layer of comfort as you walk barefoot.
- Vertical Gardens: Utilizing a vertical garden not only adds plants but also serves as a natural privacy screen.
Simple Maintenance Tips
Keeping your outdoor space appealing doesn’t have to be a chore. Consider these maintenance tips:
- Regular Cleaning: Schedule a quick clean-up each week to keep your space neat. This will make any major cleaning efforts less daunting.
- Watering Schedule: Create a watering schedule to ensure your plants thrive. Most plants benefit from a deep watering once a week.
- Seasonal Changes: Change your planters and decorations with the seasons to keep your outdoor space fresh and exciting.
Final Thoughts
Transforming your outdoor area into a functional and cozy space is achievable, regardless of how much room you have. Small touches like decorations, thoughtful furniture choices, and a little maintenance can significantly improve your outdoor experience.
For more tips on outdoor living and improvement ideas, check out Apartment Therapy and explore their articles on enhancing small spaces.
Start small, take actionable steps, and enjoy the process of preparing a space that reflects your personality and meets your needs as a renter. Happy decorating!
Final Touches: Effective Strategies for a Successful End of Tenancy Clean
When preparing to move out of a rented property, ensuring a thorough end-of-tenancy clean is crucial for getting your deposit back. This process can seem daunting, but effective strategies make all the difference. Here’s a comprehensive guide to help you achieve a spotless home while maximizing your chances of a successful inspection.
Essential Areas to Focus On
During end-of-tenancy checks, there are several key areas that inspectors pay close attention to. Cleaning these spots well can significantly improve your chances of a successful inspection:
- Kitchen: Often the focal point of inspections, ensure you clean all appliances, including the oven, refrigerator, and microwave. Don’t forget cabinets and countertops.
- Bathroom: Pay special attention to the toilet, shower, and sink. The grout and tiles often need scrubbing to remove mildew and soap scum.
- Living Areas: Dust and vacuum everything, including skirting boards and behind furniture. Clean windows and remove any cobwebs.
- Bedrooms: Ensure closets and drawers are clean and empty. Dust surfaces and wash any bedding left behind.
- Floors: Vacuum carpets and mop hard floors. Make sure to tackle any stains that remain.
Step-by-Step Cleaning Strategy
Having a structured cleaning plan can help you stay organized and focused. Below is a step-by-step strategy to tackle your end-of-tenancy clean.
- Gather Supplies: Collect all necessary cleaning supplies, including a vacuum, mop, dusters, cloths, sponges, and all-purpose cleaners.
- Clear Clutter: Remove all personal belongings before you begin cleaning. This will provide a clear workspace.
- Top to Bottom: Start at the top of each room and work your way down. Dust high surfaces, then clean lower areas.
- Room-by-Room: Focus on one room at a time. This prevents you from feeling overwhelmed and allows you to see progress.
- Final Touches: Once all surfaces are clean, do a final check for any missed spots and ensure every corner is spotless.
Helpful Tips for Specific Areas
Now that you have a plan, here are some specific cleaning tips tailored for each area:
- Kitchen: Use a mixture of baking soda and vinegar to tackle tough grease stains. For stainless steel appliances, a little olive oil can restore shine.
- Bathroom: For stubborn limescale, soak affected areas with vinegar. Use a toothbrush to scrub grout lines for a fresh look.
- Windows: For streak-free windows, clean them on a cloudy day. Direct sunlight can cause cleaner to dry too quickly, leaving streaks.
Consider Professional Help
If time is short or cleaning feels too overwhelming, consider hiring a professional cleaning service. Look for companies that specialize in end-of-tenancy cleaning to ensure they meet the required standards. Websites such as Cleaning For You provide excellent services tailored to tenants’ needs.
Final Checks Before Move-Out
Before handing over the keys, do a final walkthrough to ensure everything meets the cleanliness standards expected by landlords. Here are last-minute checks you can conduct:
- Inspect all areas to make sure no personal items are left.
- Consider using a checklist to verify every room has received adequate cleaning.
- Take photos of your cleaned home as proof of its condition when you leave.
Moving out can be a stressful experience, but by following these effective strategies for a successful end-of-tenancy clean, you can leave your rented home in excellent condition. A clean home not only helps ensure you get your deposit back but also leaves a positive impression on your landlord, paving the way for your next rental opportunity.
For more cleaning tips and strategies, check out Moving.com for excellent resources related to tenancy and moving advice.
Key Takeaway:
Key Takeaway: A Comprehensive Guide to Excelling in End of Tenancy Checks
When it’s time to move out of a rental property, understanding the most inspected areas during end of tenancy checks can save you a significant amount of time, effort, and money. The process may seem daunting, but having a clear plan can make all the difference.
First, let’s discuss the kitchen. This area is typically the focus of inspections due to its appliances. You’ll need to pay special attention to the stove, refrigerator, and dishwasher. Clean these appliances thoroughly, removing grease and food particles. Use natural cleaners or vinegar for a non-toxic approach, and be sure to check behind and underneath for hidden messes.
Next, the bathroom is another area of concern. Common issues include worn faucets, soap scum, and mold. Tackle these problems by scrubbing tiles and disinfecting surfaces. Consider replacing old caulking and checking for plumbing leaks to avoid any disputes with your landlord.
Flooring, including carpets and hard surfaces, plays a crucial role in end of tenancy inspections. If you have carpets, ensure they are professionally cleaned if they have significant stains. For hard flooring, sweeping and mopping will go a long way in leaving a good impression. Remember that floor cleanliness reflects on your overall care for the home.
Don’t overlook walls and ceilings; they can accumulate grime and marks that may lead to deductions from your deposit. A simple wipe-down can refresh these surfaces.
Outdoor spaces also matter. Tidying up the garden, mowing the lawn, or sweeping pathways not only enhances the property’s curb appeal but shows respect for the landlord’s investment.
As you wrap up your cleaning, focus on those final touches. Light fixtures, door handles, and windows can easily be neglected but significantly impact first impressions.
By focusing on these areas and following these cleaning tips, you’ll set yourself up for a successful end of tenancy inspection, ensuring you leave your rental in pristine condition and paving the way for a full return of your deposit.
Conclusion
Completing your end of tenancy check might seem daunting, but being informed can make a significant difference in your experience and potentially your deposit return. Understanding the most inspected areas is crucial for successful cleaning. Focusing on kitchen appliances ensures that you leave behind a sanitized space, free from the remnants of past meals. The bathroom often draws particular attention, so addressing common issues like mold and grime can save you both time and money.
Your carpets and floors are not just about aesthetics; they play a vital role in how the property is perceived. Regular cleaning and maintenance can elevate their condition significantly before your final walk-through. Additionally, remember that walls and ceilings can easily be overlooked. These surfaces can make a lasting impression, so taking the time to clean them can be advantageous.
Outdoor spaces should not be neglected. A well-presented garden or balcony reflects your attention to detail and adds to the overall appeal of the property. don’t underestimate the power of finishing touches. Simple strategies can elevate the final presentation of your home and ease the inspection process.
By actively addressing these points, you enhance your chances of securing the full return of your deposit and leaving a positive impression on your landlord. Investing time and effort into cleaning can facilitate a smoother transition to your next home and contribute to a hopeful and pleasant moving experience.


Leave a Reply